
A beautiful bathroom can still fail behind the tile. A slow leak around a shower niche, drain, or wall junction may go unnoticed for months, damaging framing, subfloors, and adjoining rooms before there is any visible sign. That is why bathroom waterproofing steps deserve the same attention as the tile, vanity, and fixtures you see every day.
Waterproofing is not the stage to rush, substitute materials, or make decisions based on looks alone. It is a carefully sequenced part of the renovation that protects the work around it and helps the finished bathroom perform as intended for years.
Why bathroom waterproofing comes before finishes
Tile and grout are not waterproof. They form an attractive, cleanable finish, but moisture can still pass through grout joints, movement cracks, and gaps around fixtures. The waterproofing system behind the finish is what directs water back into the shower area and protects the building structure.
This matters most in showers, around tubs, on bathroom floors, and at any surface where water is likely to splash, pool, or travel. A well-built wet area accounts for regular use as well as the occasional overflow, enthusiastic child at bath time, or leaking shower door.
The best approach depends on the bathroom layout, the substrate, the shower system, and local building requirements. A walk-in shower, for example, needs carefully planned floor falls and drainage. A bathroom with a freestanding tub may have different waterproofing priorities than a compact family bathroom with a shower over the tub.
Bathroom waterproofing steps in the right order
The order of work is just as important as the products used. Applying a quality membrane over an unprepared surface, or tiling before a flood test, can create problems that are difficult and expensive to correct later.
1. Start with a sound, dry substrate
Waterproofing needs a stable base. Before any membrane is applied, the renovation team should inspect the floor structure, wall framing, and sheeting for movement, rot, swelling, cracks, or uneven areas. Damaged materials should be replaced rather than covered up.
In shower areas, use an appropriate tile backer board or approved wet-area substrate, not standard wallboard. Fasteners, board joints, and penetrations must also be prepared according to the waterproofing system being used. This creates a clean, stable surface for the membrane to bond to.
Floor preparation also matters. The shower floor must slope consistently toward the drain so water does not sit beneath the tile. If the base is uneven or the drain is set at the wrong height, waterproofing alone cannot solve the issue.
2. Plan the drainage and plumbing details
The drain is one of the most critical waterproofing connections in the room. It needs to integrate correctly with the shower pan or floor membrane so water is guided into the drainage system, not beneath the finish.
Plumbing rough-ins should be completed before waterproofing begins. That includes shower valves, supply lines, drain locations, niches, and any body sprays or handheld shower connections. Last-minute plumbing changes after the membrane is installed create unnecessary penetrations and increase the chance of a weak point.
A professional installer also considers how shower screens, bath edges, and vanity plumbing will meet finished surfaces. Small details such as these affect where water can travel and how joints should be sealed.
3. Reinforce corners, joints, and penetrations
Corners and changes of plane are common failure points because buildings move slightly over time. Wall-to-floor junctions, internal corners, board joints, and transitions around shower pans need reinforcement as part of the waterproofing system.
Depending on the system, this may involve waterproof tape, fabric, preformed corner pieces, sealant, or a combination of materials. Pipes and mixer valves also need properly fitted seals or collars. Simply brushing membrane around a pipe opening is rarely the same as creating a reliable, flexible seal.
The goal is to create a continuous protective layer. There should be no unprotected break where water can reach the framing or floor beneath.
4. Apply the waterproof membrane correctly
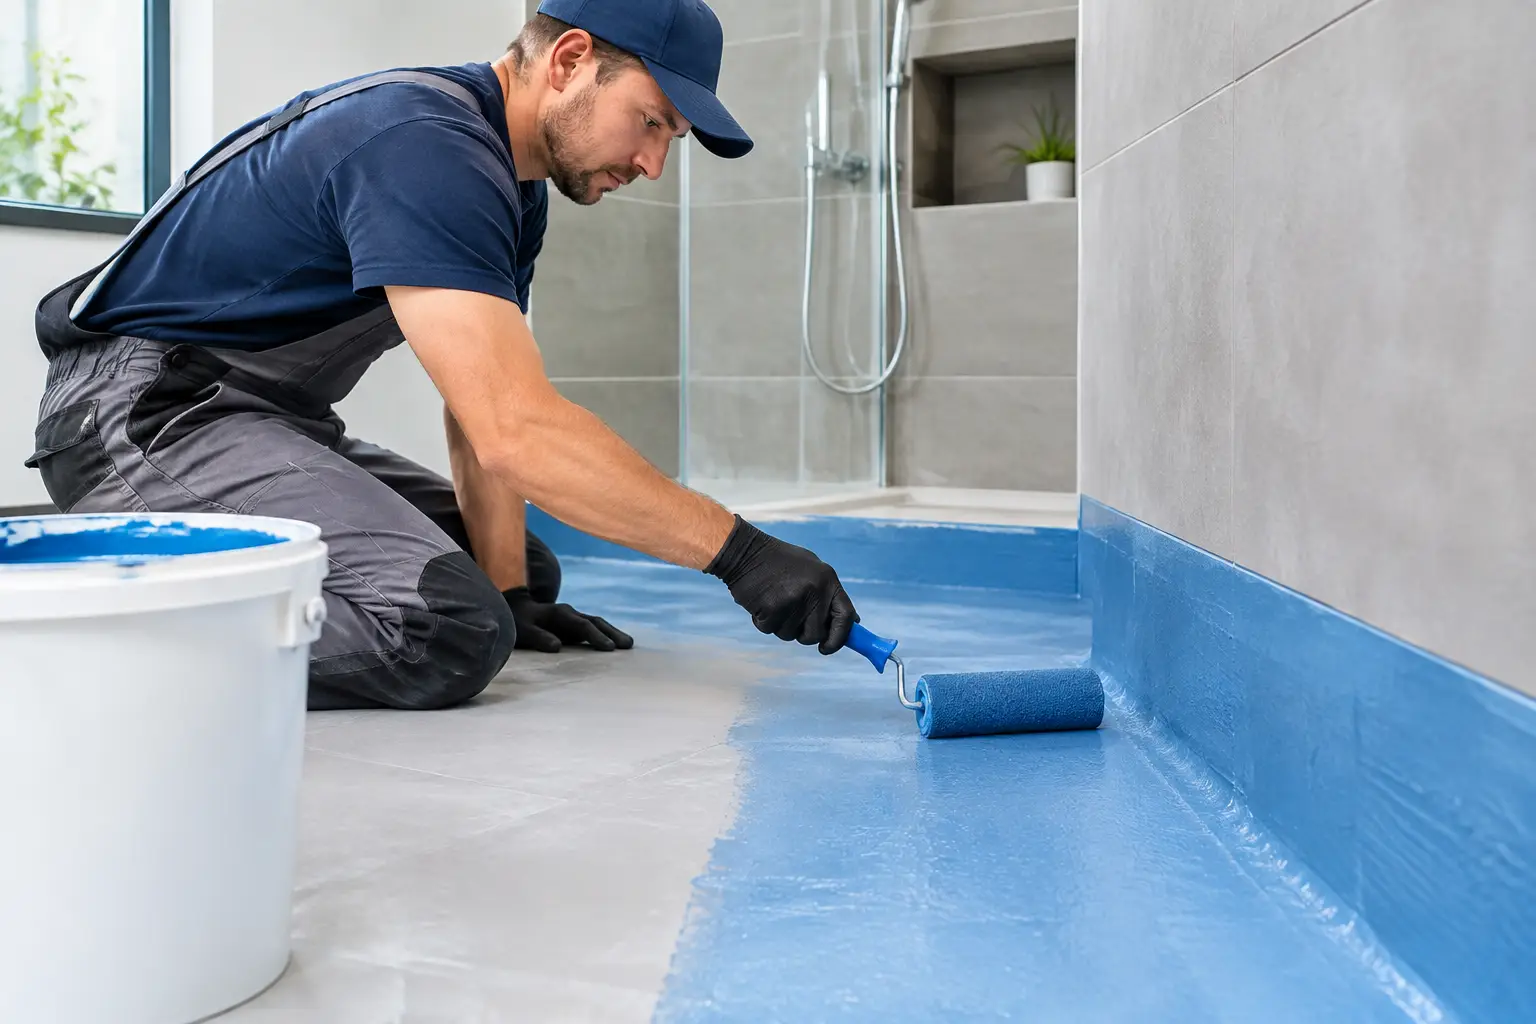
Liquid-applied membranes are common because they can form a continuous coating across floors, walls, corners, and complex details. Sheet membranes are another option, particularly in some shower systems. Neither is automatically better in every situation. The right choice depends on the product specifications, substrate, installation method, and project requirements.
With a liquid membrane, coverage and thickness are essential. Coats that are too thin may not perform as intended, while insufficient drying time between coats can compromise adhesion. The installer should apply the membrane evenly and extend it to the required areas, including wet walls and floor zones.
Waterproofing should never be treated as a quick paint-on task. Proper curing takes time, and conditions such as moisture, temperature, and ventilation can affect the process. Allowing the system to cure fully protects the schedule later by reducing the risk of having to remove finished tile to repair a concealed issue.
5. Test before tile is installed
A flood test is one of the strongest quality checks for a shower floor or shower pan. After the waterproofing has cured, the drain is temporarily plugged and the area is filled with water to a safe test level. The level is checked over the required period to confirm that the system holds water and that no leaks appear below or around the shower.
Not every bathroom layout is tested in exactly the same way, and local code requirements can vary. Still, testing before tile is installed is a sensible safeguard. Once tile, grout, and fixtures are in place, identifying the source of a leak becomes far more disruptive.
6. Tile without damaging the waterproof layer
Tiling comes after the membrane has cured and passed any required testing. At this point, installers need to avoid puncturing the waterproofed area with unnecessary fasteners. Adhesives, tile layout, and trims should be selected with the wet environment in mind.
Movement joints also deserve attention. Bathrooms expand and contract slightly with changes in temperature and humidity. Flexible sealant at changes of plane, such as where walls meet floors or where a tub meets tile, helps accommodate movement that rigid grout cannot.
Areas homeowners should not overlook
Showers get most of the attention, but water damage can start elsewhere. A complete bathroom plan considers splash zones, cleaning habits, ventilation, and the way the room will be used day to day.
Pay close attention to these four areas:
- Shower niches, benches, and recessed shelves, where flat surfaces must drain properly and corners need careful sealing.
- Shower doors and screens, especially at thresholds where water can escape onto the main bathroom floor.
- Bathroom floors around toilets, vanities, and tubs, where small leaks or overflows can reach the subfloor.
- Exhaust ventilation, which does not replace waterproofing but reduces lingering humidity that can contribute to mold and deterioration.
A well-planned bathroom also balances water protection with practical design. A larger-format tile may mean fewer grout lines, but it can be harder to shape to a sloped shower floor. A curbless shower can look clean and accessible, but it requires precise floor grading and careful water management. These are design choices worth resolving early, not after construction has started.
Common waterproofing mistakes that cost more later
The most expensive bathroom waterproofing problems often begin with shortcuts that seemed minor at the time. Using incompatible products, skipping reinforcement tape, applying membrane too thinly, or failing to let it cure can all undermine the system.
Another common issue is relying on caulk as the primary defense against water. Quality sealant is valuable at movement joints and fixture edges, but it is not a substitute for a continuous waterproof membrane behind the finish. Caulk eventually requires maintenance. The waterproofing system should still protect the structure if surface sealant ages or cracks.
Homeowners should also be wary of schedules that move from framing to tile unusually fast. Efficient work is a good thing, but waterproofing has preparation, application, curing, and testing stages that should not be compressed simply to meet a cosmetic deadline.
Work with a renovation team that respects the hidden details
A bathroom renovation is easier to enjoy when the work behind the walls has been handled with the same care as the finishes in front of them. Clear scope planning, experienced trades, and documented quality checks help prevent confusion about what is being waterproofed and when the room is ready for tile.
At DY Construction Group, the focus is on organized bathroom renovations that combine practical performance with a finish that suits the home. Homeowners should feel comfortable asking how the shower floor will drain, which surfaces will be waterproofed, and what checks happen before tile installation.
Before choosing tile or finalizing a fixture layout, make waterproofing part of the first renovation conversation. It is one of the few decisions you may never see once the bathroom is complete, but it is the one that protects every decision you do see.